Frozen Dessert Table

Emme’s birthday was coming up and as she has started dancing lessons this year I had visions of a pretty pink ballerina cake, pink and white decorations, and a lovely pink dessert table.  I had pins stuck onto my Pinterest board and was getting excited about her birthday party. Well……all of that went out the window when Emme received an invite to a Frozen birthday party!!!  So it was no longer a pretty pink ballerina party, as she also wanted a Frozen party……arghhhhhhh.  So my visions of pink were replaced with blue.

She also wanted a buttercream swirl cake with snowflakes on it, just like her friend had.  So after a bit of compromising we ended up with two cakes…..the one I wanted and the one she wanted.

The fondant cake was a 5” chocolate cake with chocolate ganache and then covered in fondant.  For the icicles I used my extruder, which is a life saver but still a time consuming job putting them on.  As you can see figurines are not my strong point, and I struggle with getting the right proportions. That is why I went for something a bit more cartoon/caricature style.

The buttercream cake was a 7” white chocolate cake covered in ombre rose swirls.  This turned out to be an expensive cake as I ended up breaking my scrapper blade when I started to cream the butter!!  I had softened the butter, but after starting the mixer it went around once, made a snapping noise and the blade broke.  So it was a rush to find another blade in the cupboard.  Then I had a bit of a colour mix up with the top layer of rose swirls.  As you can see it is more green than light blue.  This is due to New Zealand butter been very yellow, due to our cows been grass fed.  So if you mix yellow and a little bit of blue, of course you get green!!!  I was halfway around the top layer when Emme asked “Why’s the top green Mummy?”  Opps I was in such a rush I hadn’t even noticed, and with the party in about an hour I was not going to scrap it off and start again!!!

The snowflakes were made with fondant mixed with a bit of tylose (CMC).  I made these a couple of days prior to the party so they could harden up.  You need to make them at least the night before (the longer the better), otherwise they might start to soften when you place them on the buttercream.

Emme dressed up in her Frozen costume in front of her dessert table.


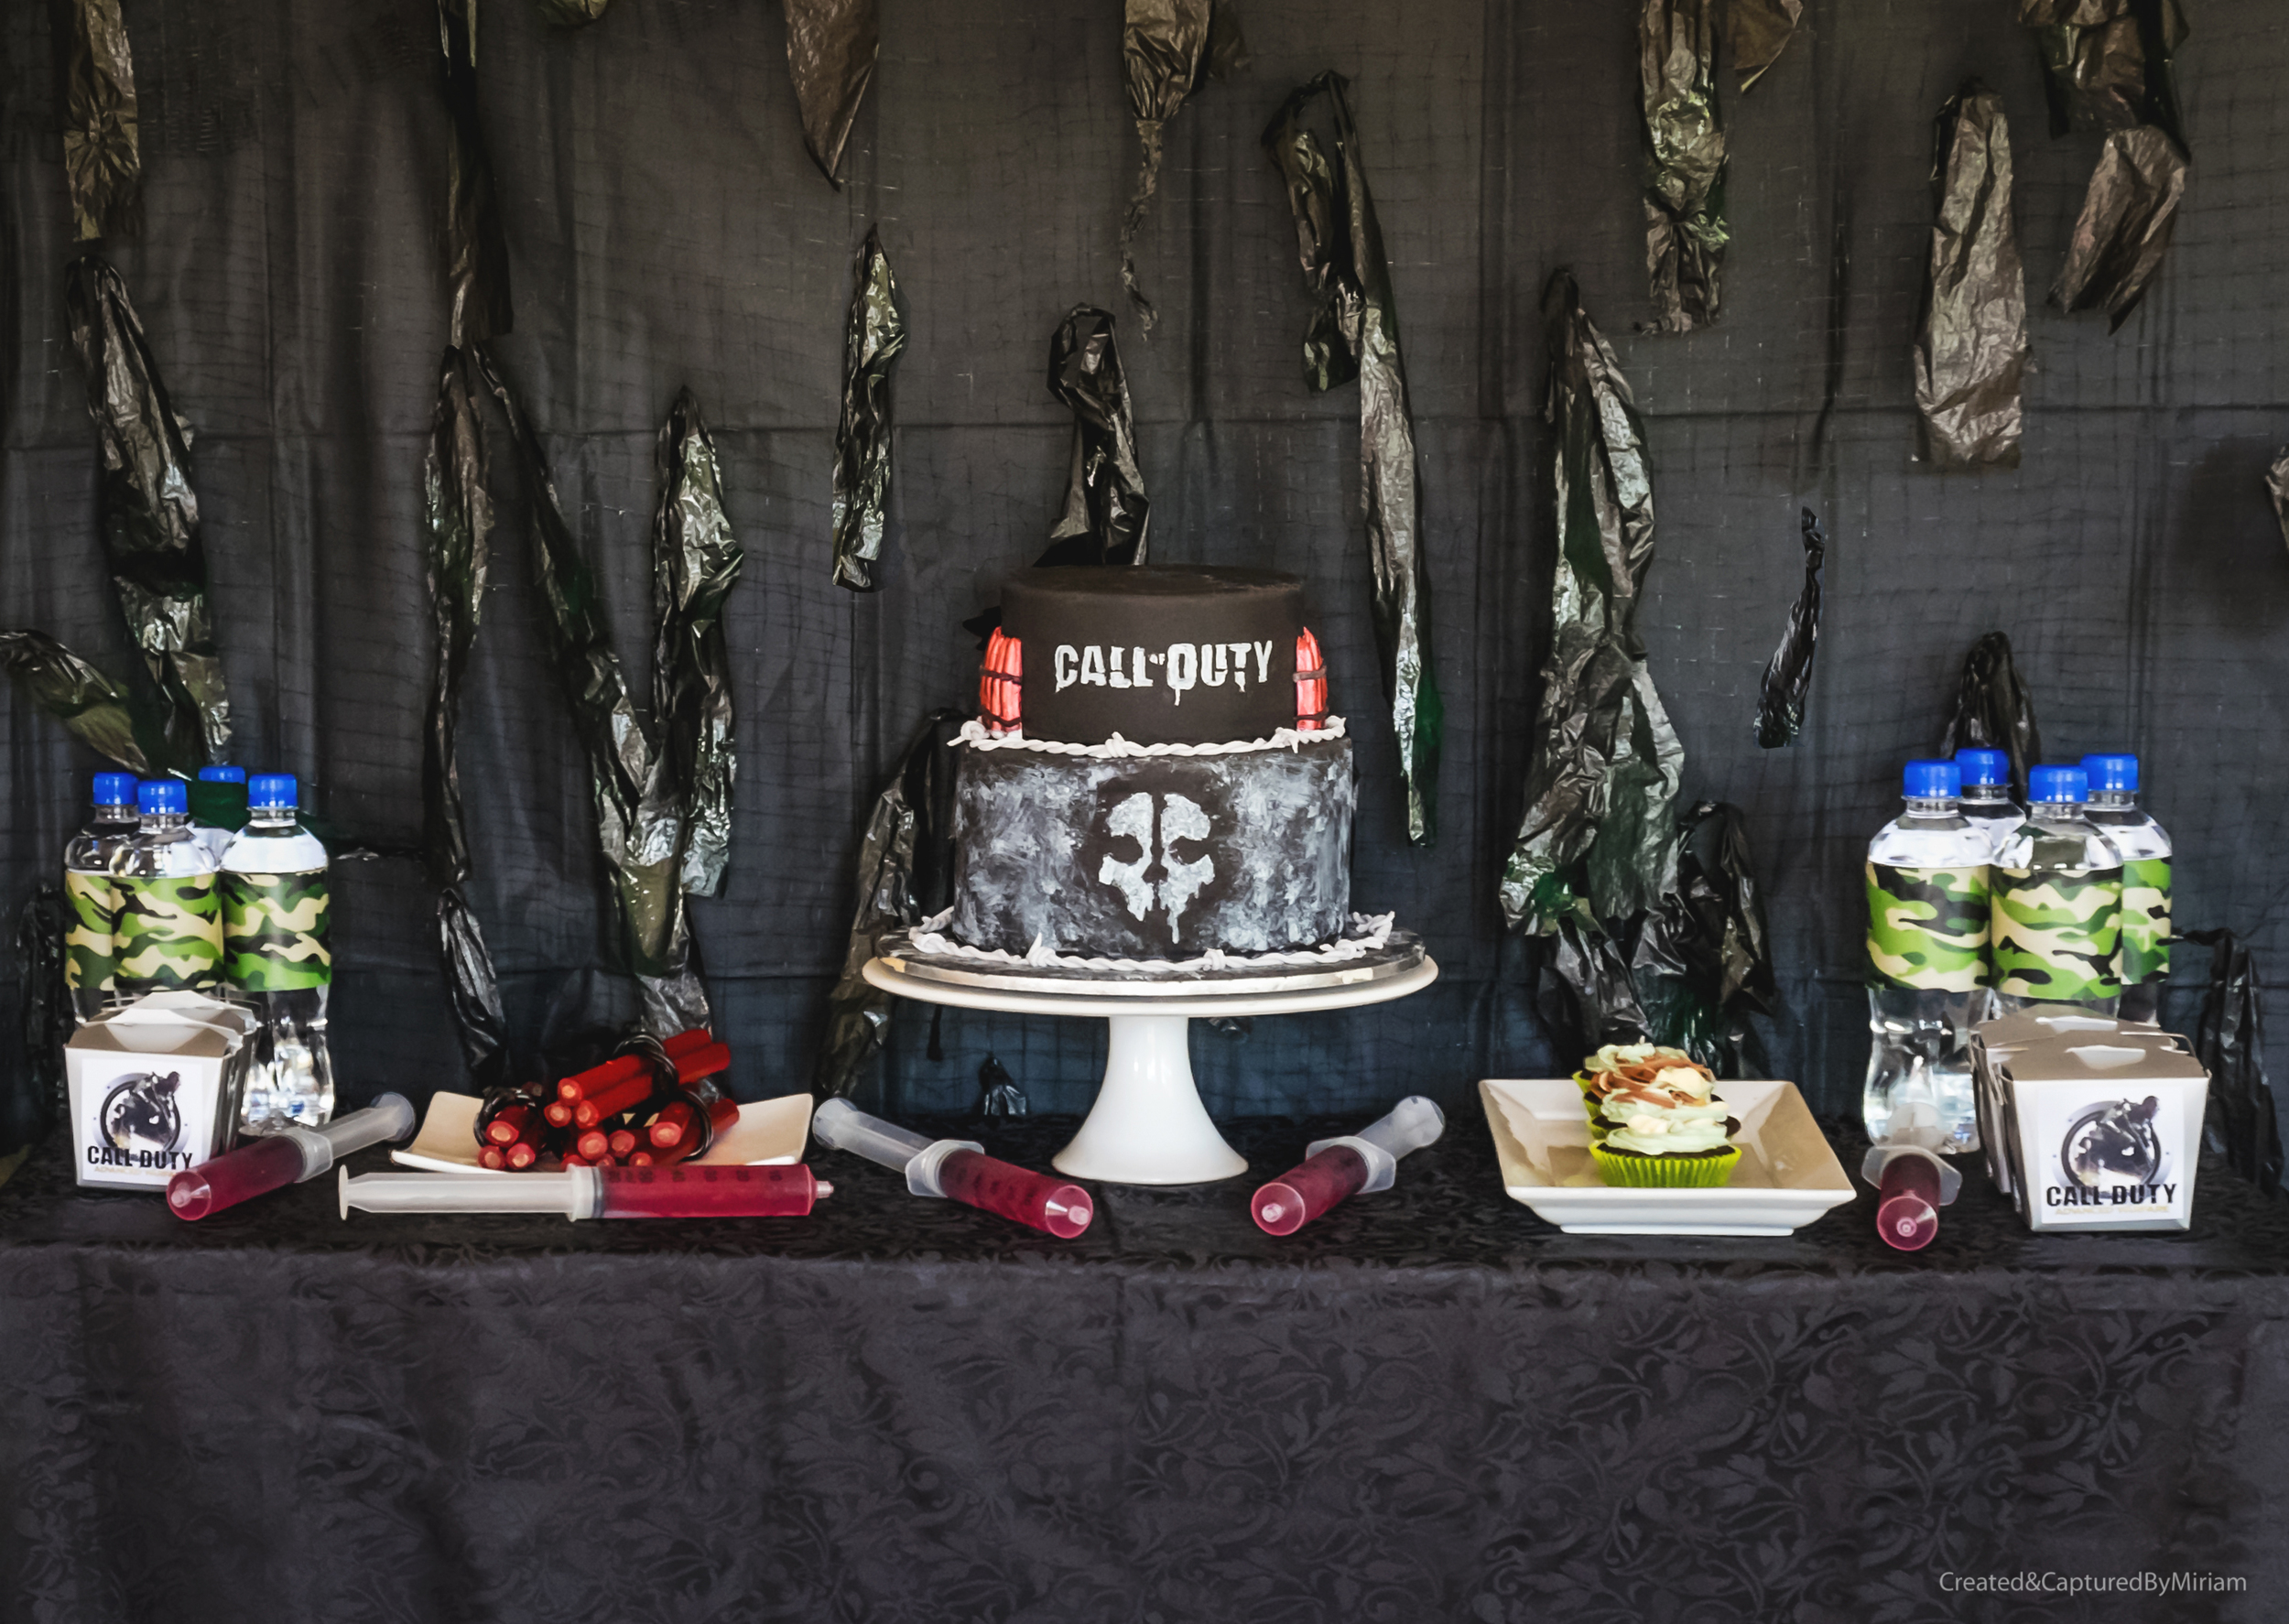
Call Of Duty Dessert Table

I always make a special cake and a dessert table for my kids birthday. When I asked Mason what cake he wanted this year it was no surprise that he replied “Call Of Duty” as it’s his favourite Playstation game.

I made an 8” chocolate cake, covered in chocolate ganache for the bottom tier, and the top tier was a small 6” white chocolate cake with white chocolate ganache.  If I’m making a black or red cake I always use the pre coloured fondant from Satin Ice.  It is more expensive than the Bakels I would normally use and colour, but it is a lot easier (less stressful) to use.  For the face on the bottom, and the lettering on the top I made templates out of cardboard.  I then used white gel colouring to sponge on the bottom, and a paint brush for the lettering on top.

I wasn’t really organised for the backdrop, and should have brought some camo netting.  But as I left it to the last minute it was a DIY job.  I got some black netting from our local hardware store, and some green spray paint.  Hubby tied some ripped up rubbish bags onto the netting and spray painted it.  When it had dried I then put it up against a black table cloth on the wall.

The kids loved the blood syringes.  These were really easy to make - red jelly as per instructions on the packet, let it cool down a bit and then suck up into the syringes, and then into the fridge to set.

I used red licorice for the TNT, and then thin blacks strips of licorice to tie them together.

The chocolate cupcakes were iced in camo coloured buttercream.  For the water bottles and noodle boxes, I printed out pictures from the internet and glued these on.

As you can see it doesn’t cost a large amount to do your own dessert table.  I always buy noodle boxes, or paper bags from the discount stores and then decorate them myself.  It is the same with the backdrops and other decorations, I always buy from discount stores and make what I can to keep the costs down.

Call Of Duty Dessert Table

Making Gingerbread Men

Making and decorating Gingerbread Men is a Christmas tradition in the Hancock house.  It started a few years ago when I made the  Gingerbread Men, and the kids decorated them.  On Christmas Eve we would put our Gingerbread Men on a plate with a glass of milk beside the fireplace for Santa.  Of course we would also have to put some carrots there as well for the Reindeer.  The kids were always very excited the next morning to see half eaten Gingerbread Men, an empty glass, and nibbled carrots.

This year I wanted to take some photos of the kids rolling out the dough, and cutting out their Gingerbread Men.  Our house is a 1920’s villa/bungalow, so the kitchen is pretty much dark all year round and not a great place to take photos.  So I made the dough and icing, packed up the decorations and headed around to my Mums place.  My Mums house is the total opposite to mine, relatively new with lots of open space and gorgeous light streaming through.  It also helps that my Mum is a clean freak, and there’s not a bit of clutter to be found.

The kids had a great time helping me roll out the dough, picking their cutters and making their Gingerbread people.  

When the biscuits cooled it was onto the fun part – decorating them with icing!!!